海外に住み始めてから、ふと「あの濃厚な豚骨スープが飲みたい」「家二郎が食べたい」と思うことはありませんか?近くに本格的なラーメン屋がない、そもそも中華麺が手に入らない——そんな悩みを抱えている方は多いはずです。
実は、スープから麺まですべて自宅で再現することは十分可能です。本記事では、家二郎・家系・天下一品風・担々麺・油そばなど11種類のラーメンを網羅し、さらに中華麺が買えない地域向けの自作麺レシピ、海外で手に入る代替食材ガイドまで詳しく解説します。

- 家二郎・家系・天下一品風など11種類のラーメンの作り方と特徴の違い
- 中華麺が手に入らないときの自作麺レシピ(かん水代用法を含む)
- チャーシュー・味玉・メンマなどトッピングの作り方
- 海外で調達できる代替食材と入手先ガイド
- よくある質問への回答(豚骨スープは海外でも作れる? など)
ラーメンの種類 — 一覧比較表
まず、代表的なラーメンの違いを一目で把握できる比較表を示します。難易度は自宅での再現しやすさを★1〜5で評価しています(★が多いほど難しい)。
| 種類 | スープベース | 麺の太さ | 難易度 | 調理時間 | 特徴 |
|---|---|---|---|---|---|
| 家二郎 | 豚骨醤油 | 極太 | ★★★★ | 3〜4時間 | 背脂・ニンニク・山盛りヤサイ |
| 家系ラーメン | 豚骨醤油+鶏油 | 太麺 | ★★★★ | 4〜6時間 | ほうれん草・海苔・濃厚白湯 |
| 天下一品風 | 鶏白湯(とろみあり) | 中太 | ★★★★★ | 4〜5時間 | ドロドロスープ・野菜ペースト |
| 山岡家風 | 豚骨(濃厚背脂系) | 太麺 | ★★★★ | 3〜4時間 | 背脂チャッチャ・豚骨臭あり |
| 塩ラーメン | 鶏ガラ・昆布・貝 | 細〜中細 | ★★ | 30分〜1時間 | 透き通ったクリアスープ |
| 醤油ラーメン | 鶏ガラ・醤油タレ | 細〜中細 | ★★ | 30分〜1時間 | 醤油ベースで食べやすい |
| 味噌ラーメン(札幌風) | 豚骨×味噌 | 中太縮れ麺 | ★★★ | 1〜2時間 | もやし炒め・ラード・コーン |
| 担々麺 | ゴマ×鶏ガラ×豆乳 | 細〜中細 | ★★ | 30〜45分 | ゴマの香り・辛肉みそ |
| 台湾ラーメン | 醤油系(薄め) | 細麺 | ★★ | 30〜40分 | 台湾ミンチの旨辛トッピング |
| つけ麺 | 豚骨×魚介(濃厚) | 極太〜太麺 | ★★★ | 1〜2時間 | 濃厚つけ汁に麺をつけて食べる |
| 油そば | 醤油タレ+香味油 | 中太〜太麺 | ★ | 15〜20分 | スープなし・タレと油のみ |
こってり系ラーメンの作り方
家二郎(二郎インスパイア)
ラーメン二郎のインスパイア系「家二郎」は、極太麺・背脂・山盛りのヤサイ(もやし+キャベツ)・ニンニクが特徴の豪快な一杯です。スーパーで揃う食材で本格的な一杯が楽しめます。
スープの材料(2〜3人前):
- 豚バラブロック 400g(チャーシュー兼スープ素材)
- 豚背脂 200g(スーパーの精肉売り場で入手可能)
- 手羽元 4本
- 水 1.5L
- 醤油 大さじ4、みりん 大さじ2、酒 大さじ2
- ニンニク 4〜6片、生姜 1かけ
作り方:
- 豚バラと手羽元を沸騰した湯で10分下茹でし、流水で洗う(アク抜き)。
- 大鍋に水と下処理した肉類、背脂、ニンニク、生姜を入れ、強火で沸騰させたら中火で2〜3時間煮込む。
- 醤油・みりん・酒で味を整える。スープはこってり濃厚に仕上げるため、必要なら煮詰める。
- 背脂は別鍋で茹でてから引き上げ、粗くほぐしてチャッチャ用に取り置く。
- もやし・キャベツを茹でてヤサイを用意。ニンニクはすりおろす。
- 極太麺(または自作麺)を茹でて丼に盛り、スープを注いでヤサイ・背脂・ニンニクを盛る。
関連レシピ: 背脂ラーメン by リュウジ
家系ラーメン
横浜発祥の家系ラーメンは、豚骨と鶏ガラを合わせた白濁スープに醤油タレを合わせ、ほうれん草・チャーシュー・海苔をトッピングする王道スタイルです。鶏油(チーユ)の香りが決め手になります。
スープの材料(3〜4人前):
- 豚骨(ゲンコツ)500g ※手羽元で代用可
- 鶏ガラ 500g(または手羽先 6本)
- 水 1.5L
- 生姜 2切れ、ニンニク 3片、長ねぎ(青い部分)1本分
醤油タレの材料:
- 醤油 100ml、みりん 大さじ3、砂糖 大さじ1
- 昆布 5cm角 ×1枚
作り方:
- 豚骨と鶏ガラを30分水に浸して血抜きし、下茹で後に洗う。
- 大鍋に材料と水を入れ、強火で沸騰。白濁するまで中強火で3〜4時間煮込む(圧力鍋なら1〜1.5時間)。
- 醤油タレを別鍋で合わせてひと煮立ちさせ、昆布は取り出す。
- 丼にタレ大さじ2〜3、鶏油(スープ表面の脂を取ったもの)小さじ1を入れ、スープを注いで太麺を盛る。
- ほうれん草・チャーシュー・海苔・白ごまをトッピングして完成。
関連レシピ: 家系ラーメン by リュウジ / チャーシュー醤油ラーメン by コウケンテツ
天下一品風 鶏白湯ラーメン
京都の名店「天下一品」のこってりラーメンは、鶏骨と野菜を長時間煮込んでミキサーにかけた「ドロドロスープ」が最大の特徴です。水というよりもポタージュに近い濃度が特徴で、自宅再現には最もハードルが高い一品ですが、ハンドブレンダーがあれば挑戦できます。
材料(3〜4人前):
- 鶏ガラ 1kg、手羽先 4本、鶏皮 200g
- じゃがいも 1個(とろみ出し)、玉ねぎ 1個、にんじん 1/2本
- ニンニク 1球、生姜 2片、長ねぎ(青い部分)
- 水 1.5L
- 醤油 大さじ2、塩 小さじ1〜2、鶏ガラスープの素 大さじ1
作り方:
- 鶏骨類を下茹でし、野菜類とともに鍋に入れ、水から強火で加熱。
- 沸騰したら弱中火で3〜4時間、野菜がとろけるまで煮込む。
- 煮込んだ具材(骨以外)をすべて取り出し、ハンドブレンダーで滑らかになるまで攪拌する。
- ペーストをスープに溶き混ぜ、醤油・塩で味を整える。
- 中太麺に注いで、ネギ・チャーシューをトッピングして完成。
関連レシピ: 鶏白湯醤油ラーメン by コウケンテツ
山岡家風 濃厚豚骨ラーメン
ロードサイドチェーンとして知られる山岡家の特徴は、豚骨の香りが強く・背脂たっぷり・スープが極めて濃厚な点です。好き嫌いが分かれますが、ファンからは熱狂的な支持を受けています。
材料(2〜3人前):
- 豚足 1本(またはゲンコツ 500g)
- 背脂 300g
- 手羽元 4本
- ニンニク 1球、生姜 2片
- 水 1.5L
- 醤油 大さじ3、塩 小さじ1、みりん 大さじ1
作り方:
- 豚足・背脂・手羽元を下茹でし、流水で洗う。
- 大鍋に全材料と水を入れ、強火で沸騰させる。
- 白濁が出てきたら中火〜中強火で2〜3時間煮込む(山岡家の特徴的な豚骨臭を出すため、蓋を開けて煮込む)。
- 醤油・塩・みりんで味を整え、仕上げに背脂をすくって別皿に取る。
- 太麺に注ぎ、チャーシュー・背脂・ニンニクをトッピングして完成。
あっさり系ラーメンの作り方
塩ラーメン
あっさり系の代表格、塩ラーメン。透き通った黄金色のスープは、鶏ガラと昆布・塩タレを合わせた清湯(ちんたん)スープが基本です。海外でも鶏ガラさえあれば簡単に作れるため、初心者にもおすすめです。
材料(2人前):
- 鶏ガラ 1羽分(または手羽先 6本、手羽元 6本)
- 水 1.2L
- 生姜 2切れ、長ねぎ(青い部分)、ニンニク 1片
塩タレの材料:
- 塩 大さじ1.5、日本酒(または白ワイン)大さじ2
- みりん 大さじ1、昆布水(昆布を水に1時間浸けたもの)大さじ2
- 白醤油(または薄口醤油)小さじ2
作り方:
- 鶏ガラを冷水から加熱し、沸騰したらアクをとり、弱火で1時間煮込む(透き通らせるため強火にしない)。
- 塩タレ材料を小鍋でひと煮立ちさせ、冷ます。
- スープをこして、丼にタレ大さじ1.5を入れ、スープを注ぐ。
- 仕上げに鶏油(鶏の脂)またはごま油少量を加えて香りをつける。
- 細麺を盛り、チャーシュー・メンマ・ネギをトッピング。
関連レシピ: 究極の塩ラーメン by リュウジ
醤油ラーメン
醤油ラーメンは、鶏ガラスープに醤油タレ(かえし)を合わせたシンプルかつ奥深い一杯です。東京風(あっさり系)から北海道風(濃いめ)まで幅広いバリエーションがあります。
醤油タレ(かえし)の作り方:
- 醤油 100ml、みりん 大さじ3、酒 大さじ2、砂糖 小さじ1
- 昆布 5cm、煮干し 5〜6本(あれば)
全材料を小鍋に入れ、弱火で5分温める(沸騰させない)。冷蔵庫で1週間保存可能なため、まとめて作っておくと便利です。
作り方(スープ仕上げ):
- 塩ラーメンと同様に鶏ガラスープを取る。
- 丼に醤油タレ大さじ2〜3、鶏油またはごま油少量を入れる。
- 熱々のスープを注いで中細麺と具材を盛って完成。
関連レシピ: ラーメン by リュウジ
変わり種ラーメンの作り方
味噌ラーメン(札幌風)
北海道・札幌発祥の味噌ラーメンは、炒めた豚ひき肉・もやし・ニラをスープに混ぜ込んだ具だくさんな一杯です。ラードをたっぷり使うことでスープが冷めにくいのも特徴です。
材料(2人前):
- 豚ひき肉 100g
- もやし 1袋(200g)、ニラ 1/3束、にんじん 1/4本
- 鶏ガラスープ(または市販のチキンブロス)600ml
- 味噌 大さじ3〜4(白味噌と赤味噌を半々がおすすめ)
- 豆板醤 小さじ1、ニンニク 2片、生姜 1片
- ラード 大さじ1(バターで代用可)、ごま油 小さじ1
- 醤油 小さじ1、砂糖 小さじ1
作り方:
- フライパンにラードを熱し、みじん切りニンニク・生姜・豆板醤を炒めて香りを出す。
- 豚ひき肉を加えてそぼろ状に炒め、にんじん・もやし・ニラを加えてさっと炒める。
- 鶏ガラスープを加えて温め、味噌を溶き入れ、醤油・砂糖で調味する(沸騰させない)。
- 仕上げにごま油を加え、中太縮れ麺の上に注いでコーンとバターをのせて完成。
関連レシピ: 味噌ラーメン by さくら
担々麺
担々麺は中国四川料理が原点で、日本ではすりごまと豆乳・豚ひき肉の辛肉みそ(炸醤)を組み合わせたまろやかな旨辛スープが定番です。ごま油や練りごまが手に入らない場合でも、すりごまで代用できます。
スープの材料(2人前):
- すりごま(白)大さじ4〜5(または練りごま 大さじ2)
- 豆乳(無調整)200ml(または牛乳)
- 鶏ガラスープ 400ml
- 醤油 大さじ1、ごま油 大さじ1、酢 小さじ1
- 豆板醤 小さじ1〜2(辛さ好みで調整)
辛肉みそ(炸醤)の材料:
- 豚ひき肉 100g、醤油 大さじ1、甜麺醤(またはみそ小さじ2+砂糖少量)大さじ1
- 豆板醤 小さじ1、ニンニク 1片、生姜 少量
作り方:
- 炸醤を作る:ごま油でニンニク・生姜を炒め、豚ひき肉を加えてそぼろ状に。醤油・甜麺醤・豆板醤を加えて炒め合わせる。
- スープを作る:鶏ガラスープを温め、すりごま・豆乳・醤油・ごま油・酢・豆板醤を加えて混ぜる。
- 丼に細麺を盛り、スープを注いで炸醤・刻んだ青ネギ・ラー油をトッピング。
台湾ラーメン
実は名古屋発祥の台湾ラーメンは、台湾の麺料理「担仔麺(タンツーメン)」をヒントに名古屋の「味仙」で生まれました。旨辛の台湾ミンチをスープに加えた個性的な一杯です。
台湾ミンチの材料(2〜3人前):
- 豚ひき肉 200g
- 赤唐辛子 2〜3本(好みで調整)、ニラ 1/2束
- ニンニク 2片、生姜 1片
- ごま油 大さじ1、醤油 大さじ1、オイスターソース 大さじ1
- みりん 大さじ1、豆板醤 大さじ1
作り方:
- フライパンにごま油を入れ、弱火でニンニク・生姜・豆板醤・赤唐辛子を香りが立つまで炒める。
- 豚ひき肉を加えて中火でそぼろ状に炒め、ニラを加えてさっと混ぜる。
- 醤油・オイスターソース・みりんを加えて汁気がなくなるまで炒め合わせる。
- 薄めのあっさり醤油スープを丼に注ぎ、細麺を盛って台湾ミンチをトッピング。
関連レシピ: 台湾ラーメン by 笠原将弘
つけ麺
つけ麺は、茹でた麺を濃厚な豚骨魚介系のつけ汁に浸けて食べるスタイルです。スープよりも濃い味のつけ汁と極太麺の組み合わせが特徴で、麺の量を自由に調節できる点も人気の理由です。
つけ汁の材料(2人前):
- 豚ガラスープ(または鶏ガラ)300ml
- 醤油 大さじ3、みりん 大さじ2、酒 大さじ2
- かつお節 ひとつかみ、煮干し 5本
- 砂糖 小さじ1、酢 小さじ1(隠し味)
- 水溶き片栗粉(片栗粉 小さじ1 + 水 大さじ1)でとろみ付け
作り方:
- スープにかつお節・煮干しを入れて5分煮出し、こして魚介だしを取る。
- 醤油・みりん・酒・砂糖・酢を加えて中火でひと煮立ち。
- 水溶き片栗粉でとろみをつけ、麺に絡みやすいつけ汁に仕上げる。
- 極太麺を茹でて冷水で締め、つけ汁とともに提供。食べ終わったら割りスープ(熱々の出汁)でつけ汁を薄めて飲み干す。
油そば
油そばはスープを使わない「汁なしラーメン」で、麺に醤油タレと香味油を絡めるだけで完成します。最も手軽に作れるラーメンで、調理時間はわずか15〜20分。海外でも材料が揃いやすく初挑戦におすすめです。
タレ・油の材料(1人前):
- 醤油 大さじ1.5、オイスターソース 小さじ1
- ごま油 大さじ1、お酢 小さじ1
- 砂糖 小さじ1/2、鶏ガラスープの素 小さじ1/2
作り方:
- タレ材料をすべて丼に入れてよく混ぜておく。
- 中太麺を茹でて水気をしっかりきり、熱いうちにタレの入った丼に入れる。
- 全体をよく混ぜ合わせ、チャーシュー・メンマ・刻みネギ・半熟卵・海苔をトッピング。
- 食べる前に好みでラー油と酢を追加すると本格的な味わいに。
自作麺の作り方(中華麺が手に入らない地域向け)

中華麺がスーパーで買えない地域にお住まいの方でも、小麦粉と重曹(ベーキングソーダ)があれば自宅で本格的な中華麺が作れます。かん水(アルカリ塩水)の役割を重曹で代用する方法です。
基本の中華麺レシピ(かん水 or ベーキングソーダ代用)
材料(2人前):
- 強力粉 200g(または強力粉150g+薄力粉50g)
- 水 70〜80ml(加水率35〜40%)
- 塩 小さじ1/4
- かん水(または重曹水): 重曹を使う場合は下記参照
重曹でかん水を作る方法(2つの方法):
- 重曹水をそのまま使う方法(簡易版): 水80mlに重曹小さじ1を溶かして使用。麺の弾力は控えめだが扱いやすい。
- 重曹を焼く方法(本格版): 重曹(炭酸水素ナトリウム)をオーブンで200℃・20分焼くと炭酸ナトリウムに変化し、より本物のかん水に近いアルカリ性が得られる。水80mlに焼き重曹小さじ1を溶かして使用する。
麺の作り方:
- 小麦粉に塩とかん水(または重曹水)を少しずつ加えながらこねる(約10分)。
- 生地をまとめてラップに包み、30分以上休ませる(グルテンを落ち着かせる)。
- 生地を伸ばして麺棒で薄く広げ(2〜3mm厚さ)、多めの打ち粉をして折りたたみ、包丁で切る。
- たっぷりの沸騰した湯で2〜3分茹でて完成。
太麺・細麺・ちぢれ麺の作り分け
麺の太さや食感は、加水率(粉に対する水の割合)と切り方で調整できます。以下の比較表を参考にしてください。
| 麺の種類 | 加水率 | 切り幅の目安 | 食感の特徴 | 合うラーメン |
|---|---|---|---|---|
| 博多風細麺 | 30〜33% | 1〜1.5mm | 細くコシあり、茹で時間が短い | 豚骨・台湾ラーメン |
| 中細麺 | 33〜36% | 2〜2.5mm | バランスのよい食感 | 塩・醤油・担々麺 |
| 中太麺 | 36〜40% | 3〜3.5mm | もちもちした食感 | 味噌・油そば |
| 太麺 | 40〜45% | 4〜5mm | ムチっとした歯ごたえ | 家系・つけ麺 |
| 極太麺(家二郎用) | 45〜50% | 6mm以上 | どっしりとした食べ応え | 家二郎 |
| ちぢれ麺 | 40〜45% | 3〜4mm(切後に手でよじる) | スープが絡みやすい | 味噌・家系 |
ちぢれ麺を作る場合は、切った麺に打ち粉をしてから両手でもみしごき、ランダムに縮らせます。自然乾燥させてから茹でると形が安定します。
自作麺を均一に仕上げるなら製麺機が便利
手打ちでは厚みのムラが出やすい太麺・ちぢれ麺も、製麺機を使えば均一に仕上がります。家二郎や家系ラーメンをよく作る方に特におすすめです。
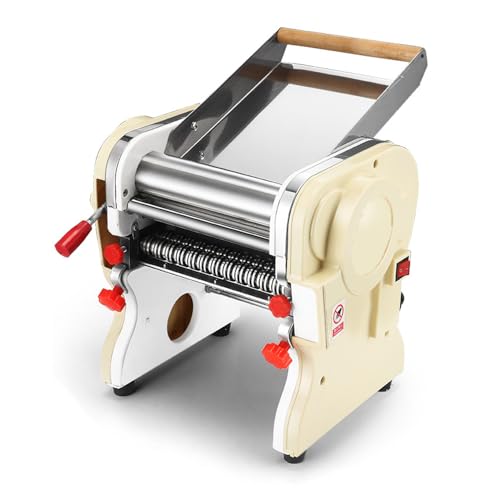
CGOLDENWALL 電動製麺機 パスタマシン(ASIN: B0D87D8DNM)
チャーシュー・味玉・メンマなどのトッピング
自家製チャーシュー(煮豚)
ラーメンの味を決める重要なトッピング、チャーシュー。自宅で作るメリットはタレがそのままラーメンの醤油スープとして使えることです。
材料:
- 豚バラブロック(または豚肩ロース)400〜500g
- 醤油 100ml、みりん 100ml、酒 100ml(1:1:1の黄金比)
- 砂糖 大さじ1、水 200ml
- ニンニク 2片、生姜 2切れ、長ねぎ(青い部分)
作り方:
- 豚肉はタコ糸で巻いて形を整える(バラ肉の場合はくるくると巻いて固定)。
- フライパンで強火にして全面に焼き色をつける(旨みを閉じ込めるため)。
- 鍋に焼いた肉・調味料・香味野菜・水を入れ、沸騰したら弱火で1〜1.5時間煮込む。
- 火を止めて粗熱を取り、煮汁ごとジッパーバッグに入れて冷蔵庫で一晩休ませると味が深まる。
- 食べる前に薄切りにし、バーナーか焼き網で表面を軽く炙ると香ばしくなる。
味付け半熟卵(味玉)
ラーメンに欠かせない味玉。コツを知れば誰でもとろとろの半熟卵が作れます。
材料(4個分):
- 卵 4個
- 醤油 大さじ3、みりん 大さじ2、酒 大さじ1、水 大さじ3
- 砂糖 小さじ1(オプション)
作り方:
- 卵を冷蔵庫から出して室温に10分置く(急激な温度差を避けるため)。
- 沸騰した湯に卵を入れ、6分30秒〜7分茹でる(とろとろ仕上げは6分30秒、しっかり目は7分)。
- すぐに氷水に取り、1〜2分冷やしてから殻をむく。
- 漬けダレ材料を鍋でひと煮立ちさせ、冷ます。
- ジッパーバッグに卵と冷ましたタレを入れ、冷蔵庫で4〜8時間漬けて完成。
関連レシピ: 味付け卵 by 笠原将弘
メンマ・ほうれん草・海苔
メンマ(自家製): たけのこ(水煮缶)を細切りにし、ごま油で炒めて醤油・みりん・砂糖・オイスターソースで味付けするだけで完成します。本物のメンマは乳酸発酵した麻竹を使いますが、水煮たけのこで十分美味しく作れます。
ほうれん草の下茹で: ほうれん草は塩を入れた沸騰湯で1〜2分茹でて、冷水で締めると色鮮やかに仕上がります。水気をしっかり絞り、食べやすい長さに切ってラーメンに添えます。
海苔: 焼き海苔をそのままトッピングするだけでOK。家系ラーメンには3枚を立てかけるのが定番です。海苔が手に入らない場合は韓国海苔や中華食材店の乾燥海苔で代用できます。
海外で手に入る代替食材ガイド
海外では日本の食材が手に入りにくい場合があります。以下の表で代替品と入手先を確認してください。アジア系食料品店(Asian grocery store)は多くの国にあり、かなりの種類の日本食材が揃います。
| 日本の食材 | 海外での代替品 | 主な入手先 | 注意点 |
|---|---|---|---|
| 中華麺 | スパゲッティ(重曹水で茹でる)、自作麺 | スーパー全般 | 卵入りパスタがより中華麺に近い |
| かん水 | 重曹(Baking Soda)を焼いたもの | スーパー(ベーキング コーナー) | 200℃20分焼くと炭酸ナトリウムに変化 |
| 醤油 | キッコーマン・亀甲万(輸入品) | アジア系食料品店、大型スーパー | 中国系醤油は味が異なるため注意 |
| みりん | スイートライスワイン(米国)、酒+砂糖で代用 | アジア系食料品店 | 酒大さじ1+砂糖小さじ1が目安 |
| 豚骨・鶏ガラ | 精肉店に骨を別注文、手羽元・手羽先で代用 | スーパーの肉売り場・精肉店 | 手羽元は豚骨の代わりに使えてうまみも豊富 |
| ラード | Lard(輸入品)、背脂、バター、ショートニング | 大型スーパー | バターはコクが出るが風味が異なる |
| 豆板醤 | サンバルソース、コチュジャン+ごま油 | アジア系食料品店 | コチュジャンは甘みが強いため量を調整 |
| 練りごま・すりごま | Tahini(タヒニ)、白ゴマをミキサーで自作 | 中東系食料品店、大型スーパー | タヒニは担々麺に使えるが塩気が少ない |
| 鶏ガラスープの素 | Chicken bouillon cubes(チキンブイヨン) | スーパー全般 | 塩分が強いため使用量を減らして調整 |
| メンマ | 水煮たけのこ(Bamboo Shoots缶)で自作 | アジア系食料品店、大型スーパー | 調味して自作するのが最も簡単 |
| 焼き海苔 | 韓国海苔(Roasted Seaweed) | アジア系食料品店、コリアンスーパー | 韓国海苔はごま油と塩が強めのものあり |
おすすめアイテム
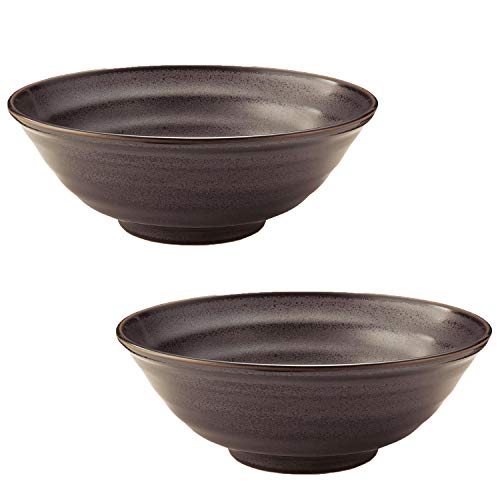
ラーメン丼(麺鉢)
本格的なラーメンを楽しむには、大きめのどんぶりが必要です。美濃焼の昔ながらの雷紋柄は食欲をそそる定番スタイルです。

美濃焼 ラーメン鉢 赤龍 昔ながらのデザイン 日本製(ASIN: B07PFSFRV8)
麺カッター・ピッツァカッター
手延べした麺生地を均一な幅で切るための専用カッターです。製麺機が大げさに感じる方でも、麺切りカッターなら簡単に手打ち麺が楽しめます。
ヨシカワ 麺切り包丁 ステンレス製 日本製(ASIN: B07Z9G3KTN)
マルタイ棒ラーメン(業務用)
海外へ送ってもらう場合や日本から持参する際に便利な業務用棒ラーメン。細麺で本場博多の風味が楽しめます。豚骨スープの素付きモデルがおすすめです。

マルタイ棒ラーメン 業務用1kg × 5袋 豚骨スープセット(ASIN: B0C7CXF5TK)
HowToCook.jpのラーメンレシピ
当サイトには人気シェフが実際に作った本格ラーメン動画のレシピが多数掲載されています。記事で紹介した手順と組み合わせて活用してください。
- 家系ラーメン by リュウジ — 豚骨醤油スープから本格再現
- 背脂ラーメン by リュウジ — 背脂チャッチャ系の決定版
- ラーメン by リュウジ — 本格醤油ラーメン
- 究極の塩ラーメン by リュウジ — 透き通った黄金スープ
- 鶏白湯醤油ラーメン by コウケンテツ — 濃厚鶏白湯の丁寧な作り方
- チャーシュー醤油ラーメン by コウケンテツ — 極上チャーシューとスープの合わせ技
- 味噌ラーメン by さくら — 札幌風もやし炒め味噌ラーメン
- 台湾ラーメン by 笠原将弘 — 名古屋名物の旨辛ラーメン
- 味付け卵 by 笠原将弘 — とろとろ半熟の作り方
- 辛ラーメンアレンジまとめ — インスタントラーメンを格上げするアレンジ集
- スタミナラーメン by さくら — 食べ応え満点のスタミナ系
- 冷やし中華 by コウケンテツ — 夏に食べたい冷やし中華
よくある質問(FAQ)
Q: 海外でも豚骨スープは作れますか?
A: 作れます。豚骨(ゲンコツ)が手に入らない場合でも、手羽元・手羽先・豚バラブロックを組み合わせることで十分コクのある白濁スープが作れます。精肉店に「骨付きの部位はありますか?」と聞いてみると、豚足やスペアリブが手に入ることもあります。圧力鍋があれば短時間で本格的なスープに仕上がります。
Q: かん水がなくても中華麺は作れますか?
A: 作れます。重曹(Baking Soda)がかん水の代用品として使えます。より本格的に仕上げたい場合は、重曹をオーブンで200℃・20分焼いて炭酸ナトリウムに変化させると、かん水に近いアルカリ性が得られます。また、スパゲッティを重曹水(水1Lに重曹大さじ1)で茹でる「パスタを中華麺風にする裏技」も有効です。
Q: 一番簡単に作れるラーメンはどれですか?
A: 油そばが最も簡単です。スープ不要で麺を茹でてタレと油を混ぜるだけ。調理時間は15〜20分で、特別な食材も不要です。次に簡単なのは塩ラーメンで、鶏ガラスープを取るだけで本格的な一杯が楽しめます。
Q: 練りごまが手に入らない場合、担々麺はどうすればよいですか?
A: 中東系食材店やスーパーで手に入るタヒニ(Tahini)が練りごまの代替品として使えます。あるいは、白ごまをフライパンで炒ってからフードプロセッサーやすり鉢で丁寧に磨り潰すと自家製練りごまが作れます。豆乳やピーナッツバターを少量加えるとスープにコクが出ます。
Q: チャーシューを作る豚肉の部位はどこがおすすめですか?
A: 豚バラブロックが最もジューシーに仕上がります。脂身の少ないものが好みなら豚肩ロース(Boston butt)がおすすめです。いずれもスーパーの肉売り場で入手できます。海外ではPork belly(豚バラ)またはPork shoulder(豚肩)と呼んでください。
Q: スープをまとめて作り置きできますか?
A: できます。豚骨・鶏白湯スープは冷蔵で3〜4日、冷凍で1ヶ月保存できます。製氷皿や保存袋で小分け冷凍しておくと、食べたいときにすぐ使えて便利です。醤油タレ(かえし)も冷蔵で2週間保存可能です。
Q: 山岡家風の強い豚骨臭を抑えるにはどうすればよいですか?
A: 下茹でと下血抜きをしっかり行うことが最大のポイントです。骨を冷水から茹でてアクをとり、流水でよく洗い直してから本格的な煮込みに入ります。生姜・長ねぎを多めに使うと臭みが和らぎます。山岡家の独特な豚骨臭が好みでない場合は、蓋をして煮込むと香りを抑えられます。
出典・参考
- 麺と釣人 — 【家二郎】基本の豚骨スープから二郎系ラーメンを作ろう【レシピ】
- 麺と釣人 — 本格的な家系ラーメンのスープの作り方【圧力鍋】
- クックピット — 天下一品の濃厚鶏白湯ラーメンをプロの味で再現したレシピ
- 橋爪麺 — 中華麺の秘密を解明:かん水の役割と最適な使用方法
- ぐるがもんブログ — パスタを中華麺風に!? 海外在住の方にも
- 白ごはん.com — 半熟煮卵のレシピ(覚えやすい黄金比のたれで)
- 製麺所 — 中華麺の作り方:加水って何?番手って何?に答えます!
- 味仙本店 — 元祖台湾ラーメン(名古屋名物・台湾ラーメン発祥の公式ページ)
- マルメン製麺所 — 札幌味噌ラーメンの奥深き世界:歴史から名店、自宅再現レシピまで徹底解説
- 米国の僻地で暮らす駐在員のブログ — アメリカで本格的な豚骨ラーメンを自作!インスタントポットを使った時短レシピ
情報の最終確認日: 2026年03月
※本記事にはAmazonアソシエイトプログラムの広告リンクが含まれます。
商品を購入された場合、当サイトに一定の報酬が発生することがあります。


![Dropstick [LegacyTitleID: 129700633]](https://m.media-amazon.com/images/I/01MKUOLsA5L._SL500_.gif)