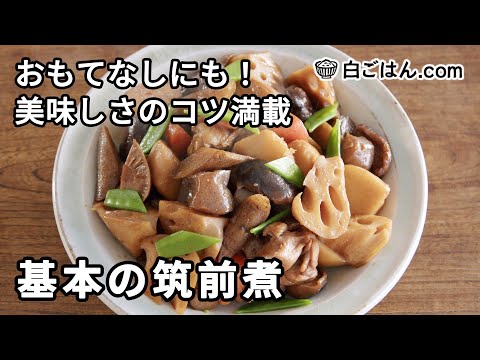
A luxurious and deeply flavorful Chikuzenni, packed with chicken and root vegetables. We'll guide you through every step, from preparing the ingredients to simmering. Perfect for entertaining, it keeps well in the refrigerator for about 5 days, so feel free to make a generous batch!
Ingredients
Main Ingredients (6 servings)
- Chicken Thigh 1 piece (approx. 300g)
- Dried Shiitake Mushrooms 4-5
- Konnyaku (Yam Cake) 1 piece
- Lotus Root 300g
- Burdock Root 2/3 root (approx. 100g)
- Carrot 1/2
- Taro (Satoimo) 400g (5-6 medium pieces)
- Green Peas (Kinusaya) 6-7 pods
Seasonings
- [A] Shiitake Soaking Liquid 150ml
- [A] Soy Sauce 5 tbsp
- [A] Cooking Sake (Rice Wine) 4 tbsp
- [A] Mirin (Sweet Rice Wine) 4 tbsp
- Oil for Sautéing 1 tsp
- Salt (to taste)
Steps
- Soak dried shiitake mushrooms in water until fully rehydrated. Strain the soaking liquid through a fine-mesh sieve and adjust to 150ml.
- Peel the lotus root with a peeler and cut into irregular bite-sized pieces, slightly larger than regular bite-sized. Soak the cut pieces in water.
- Wash the burdock root to remove dirt, then lightly scrape the skin with the back of a knife or a scrub brush. Cut into irregular pieces that can be eaten in one bite. Soak the cut pieces in water.
- Peel the carrot with a peeler, cut in half lengthwise, then into irregular pieces. Make them slightly smaller than the other vegetables.
- Wash the taro to remove dirt, peel, and cut into bite-sized pieces (2-3 pieces each).
- Place the peeled taro and water in a pot and heat from cold water. Once boiling, simmer for 3-4 minutes, then drain in a colander.
- Tear the konnyaku into bite-sized pieces using a spoon. Key Tip! Tearing with a spoon creates a rough surface that helps the flavors penetrate better.
- Add about 1 teaspoon of salt to the torn konnyaku, rub it in, and let it sit for 4-5 minutes.
- Briefly blanch the salt-rubbed konnyaku in boiling water for about 2 minutes, then drain in a colander.
- Trim the tough stems from the rehydrated shiitake mushrooms and cut them into bite-sized pieces.
- Place the chicken thigh skin-side down, remove any tough parts or excess skin. Cut into 3-4cm cubes.
- Trim the ends and strings from the green peas and blanch in boiling water for about 1 minute.
- Heat 1 teaspoon of oil in a large pot (or frying pan) over medium-low heat.
- Once the oil is hot, turn off the heat temporarily, then place the chicken pieces skin-side down in the pot.
- Once all pieces are arranged, turn the heat back to medium-low and sear the skin side. If the chicken sticks to the pot, remove it from the heat.
- Once the skin is lightly browned, flip and sear the other side. Cook until the meat changes color.
- Add the lotus root, burdock root, carrot (which have been soaked in water), and the torn and blanched konnyaku to the seared chicken.
- Stir-fry the root vegetables and konnyaku in the oil rendered from the chicken. Key Tip! Sautéing in oil before simmering infuses the oil with flavor and adds depth.
- Once the surfaces of the lotus root and other vegetables become translucent, add the parboiled taro and cut shiitake mushrooms, and sauté briefly.
- Once all ingredients are in the pot, turn off the heat, and add the 150ml of shiitake soaking liquid, 5 tbsp of soy sauce, 4 tbsp of cooking sake (rice wine), and 4 tbsp of mirin (sweet rice wine).
- Gently mix, level the ingredients, then turn on the heat.
- Once the simmering liquid comes to a boil, place a lid on top. Press down lightly, and once the liquid is vigorously boiling, reduce the heat to low.
- Simmer for 10 minutes with the lid on, ensuring the liquid is actively circulating beneath it.
- During simmering, stir the ingredients about 1-2 times to ensure even cooking. Skim off any scum that rises to the surface.
- After 10 minutes, remove the lid and start reducing the simmering liquid.
- Stir occasionally and reduce the liquid until a thin layer remains at the bottom of the pot.
- Once the desired consistency is reached, turn off the heat. Garnish with the blanched green peas when serving.